Show Quiz Results History – Admin View
A Quiz Component is a component type that allows Elevate admins to present their end-users with quiz/test that must be completed. All quizzes will issue a grade to an end-user.
- Following the steps from “How to add a Component to a Product”, give your Quiz Component a title and description. Keep in mind, the title will be used on the Product page and should be something learners will recognize. For example, you may consider using the title “Quiz” or “Test”. Keep in mind, the description will also be visible on the Product page. For example, if the title was “Quiz” your description may be “A 20 question quiz. You must answer at least 15 correctly to pass”.
- Enter the number of questions that you want to display on each page in the field called “# of questions per page”
- Enter the number of times you are allowing the learner to take the quiz. For example, if are allowing the learning 3 attempts to pass the quiz, enter “3” in the field called “Maximum number of quiz attempts”
- Enter the passing score in the field called “# of correct answers to pass”. NOTE: This is the number of correct answers. For example, if you have 10 questions and you require an 80% or better passing grade, then enter the number 8. If you have 14 questions and require an 80% or better passing grade, then enter the number 11.
- You can control how your learners review the answers after completing the quiz by choosing an option from the field called “Allow user to review quiz:”. The options are: “Never” = does not show answers, “After First attempt” = allows users to see how they answered each question but does not show correct answers, and “only after passed” = reveals answers and correct answers if the user has passed the test/quiz. Then select from two choices…“After Passed or Cannot Take Quiz Again”
- Additional options apply: timed quiz, notify admin when quiz is submitted or when questions are commonly answered incorrectly, auto shuffle questions from a pool.
- Next, create your quiz/test questions and answers using the provided fields. A “preview” function is provided to allow you to preview the quiz.
- Before saving, please be sure to review your questions/answers.
- Click “Update” to save. NOTE: Once learners have started to take the test/quiz, it is not advisable to add questions. Doing so will skew the results.
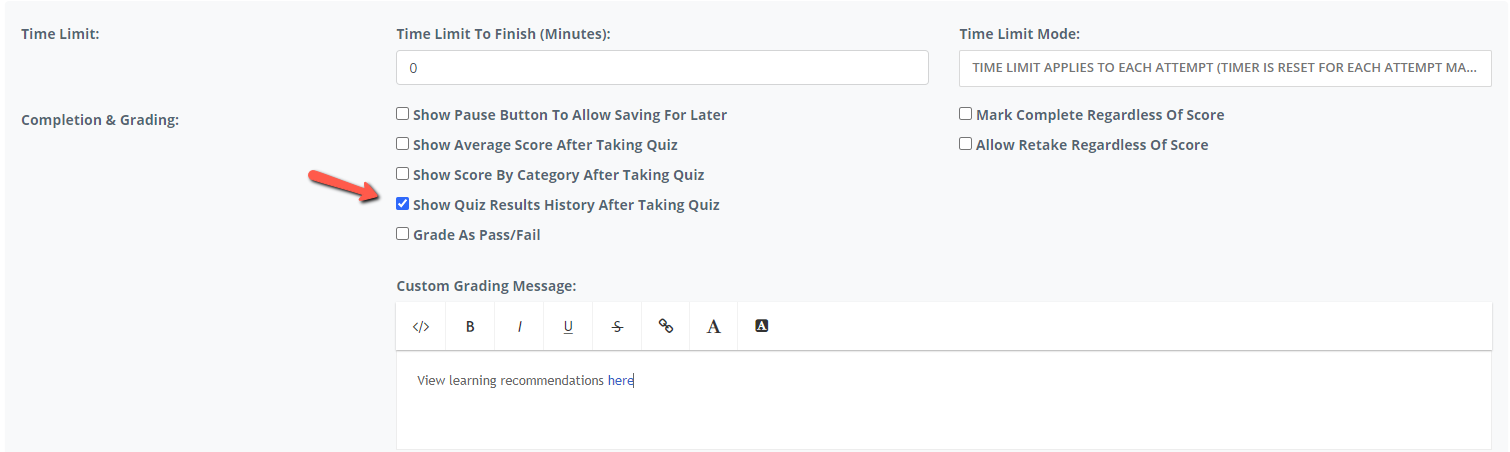
Under “Advanced” quiz settings, look for a new setting "Allow viewing quiz results history”. This feature will allow learners to see all of their Quiz scores for each attempt and optionally a “Custom Grading Message”. This is an HTML zone supporting Bold, Italic, links, but not images. This message will be displayed on the Quiz component after the user has received a Grade. (The “Allow viewing quiz results history” feature can be used in combination with the Self-Assessment Learning Path if you want your learners to see their historical grades on a Self-Assessment quiz that allows multiple attempts.)
Show Quiz Results History – Learner View

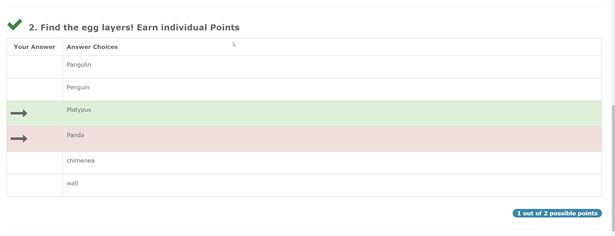
When reviewing a quiz that has multiple choice/multiple correct answers that is set to grant points for each correct answer, better tracking has been added for the learner. The enhancement includes an indication of which answer was correct, which were incorrect, which correct answers were not selected and then a total points received out of the possible points for that question. This only applies when the quiz is set to allow for review and follows the rules set for quiz review options and when to show correct answers.
Last modified Sep 27, 2024
Was this article helpful?
That’s Great!
Thank you for your feedback
Sorry! We couldn't be helpful
Thank you for your feedback
Feedback sent
We appreciate your effort and will try to fix the article