Setting Up CLE Credits and Certificate Components

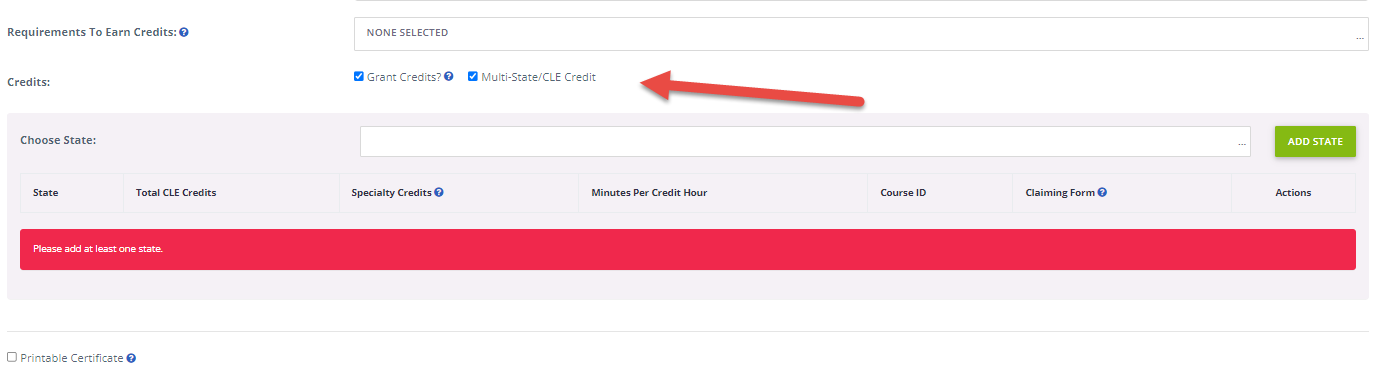
 CLE or Multi-State Credits are available through the Credits and/or Certificate Component type and allow an admin to set-up credits and certificates that can vary based on individual states. This credit type includes additional credit earning criteria such as adding specialty credit types, a course ID, and a claiming form (an additional form that may be downloaded by an end-user, in place of a certificate).


  1. From the Administrative Control Panel, navigate to Products > Product Listing, then find the Product you would like to add the CLE/Multi-State Credit and/or Certificate to. Click the "Components" icon to go to the listing of components for the product. Or, if already within the Product, click the "Components" option in the left-hand navigation.
  2. From the Components listing, click the "Create New Component" button, choose “Credits and/or Certificates” and enter a CLE/Certificate Component a title and optional description.  Keep in mind, the title will be used on the Product page and should be something learners will recognize.  For example, you may consider using the title “Certificate” or “CLE”.  Keep in mind, the description will also be visible on the Product page.  For example, if the title was “Certificate” your description may be “1 CLE / .5 Ethics Credits.”
  3. If earning of credits or the certificate is based on the completion of specific Components in this Product, you may select those Components from the "Requirements to Earn Credits" dropdown menu. Be sure to select all Components that must be completed in order for the end-user to earn credits and/or a certificate. C
  4. If you are granting credits for completing the course, check the box next to the field called “Grant Credits”.  If you don’t click this box, no credits will be earned.  However, you will still offer your learners the opportunity to receive a certificate of completion.  If granting credits, additional fields will be displayed:
    1. If you are offering credits that are applicable to different States, check the ‘Multi-State/CLE Credit” box. 

    2. Choose the first state that will be accepting credit for this course from the "Choose State" dropdown menu.
    3. Enter the Total number of CLE credits the learner will earn.
    4. Enter the number of Specialty Credits that the learner will earn.  Keep in mind, Specialty Credits are part of the Total Credits.  For example:  1 CLE of which .6 may be applied to Ethics. In this example, the Admin would enter “1” for Total CLE and “.6” in the “Specialty Credits” field.
    5. Enter the number of minutes per credit hour that is recognized by the State.  For example: “50” would be appropriate if 50 minutes = 1 credit
    6. Enter the “Course ID” that was provided by the accrediting organization.  If this course is not accredited, you may enter “not accredited” in this field.  For non-accredited content, your learners may submit for credit depending upon their jurisdiction.
    7. If you will be providing a "Claiming Form" in place of a certificate for end-users to download, upload the Claiming form by clicking the "Choose File" option under the Claiming Form column.
    8. Continue this process for each state that your end-users are able to earn credits for. 
    9. If you are not issuing a certificate for end-users, click the "Update" button at the bottom of the Component editor to return to the listing of Components or click the "Update and Stay" button to continue to edit the component.
  5. If you are providing a printable certificate you must have a CLE Certificate type set-up for your site. This can be set-up via the built-in certificate editor (Settings > Templates > Certificate Templates) or by a member of the Elevate design team.  To issue a certificate, check the box next to the field called “Printable Certificate.”
  6. If the “Printable Certificate” box is checked, thumbnails of the certificates that have been loaded into your Elevate learning portal will display. Click on the certificate that you want to use.
    1. After clicking on the certificate thumbnail, additional fields will be revealed as well as a sample of the chosen certificate.  Each certificate may contain different fields. Complete the fields provided by following the onscreen instructions for each certificate.
    2. A preview of the certificate can be viewed by clicking the "Preview" button.
  7. Once you have finished completing both the credit set-up and the certificate set-up, click the "Update" button at the bottom of the Component editor to return to the listing of Components or click the "Update and Stay" button to continue to edit the component. 


Was this article helpful?

That’s Great!

Thank you for your feedback

Sorry! We couldn't be helpful

Thank you for your feedback

Let us know how can we improve this article!

Select at least one of the reasons
CAPTCHA verification is required.

Feedback sent

We appreciate your effort and will try to fix the article