Feature Description:
Admins with site wide or Manage Account settings permissions can create and edit certificate templates to be used within credit/certificate components. Additional admins can be granted the Edit Self-Service Certificate Template Settings permission as well.
Admins can create certificates of the following types: standard, medical, CLE/Multi-State, Certification, and Multi-Product. After the template is in-use, any changes or edits to the template will apply to all instances of that certificate within your products.
Pre-existing designer-created templates for your account cannot be edited by an admin. If your certificate requirements are beyond what you can create with this tool, Elevate team members can create custom certificates for a fee.
IMPORTANT NOTE
This feature is only available on our custom branded LMS clients. Clients who are able to edit their site via the site editor will continue to use the certificate templates currently available.
Admin Settings: under Settings> Templates> Certificate Templates

Fig.1 - Admin Settings
Select “Add New Template” or “Filter” by template name or certificate type to edit existing templates. Under “Template usage” column, you can see the number of times the template has been used in a certificate/credit component and click on that number to see what products it's used in. Under actions, you can preview, edit, clone, or delete certificate templates.

Fig.2 - Certificate Templates
To begin designing a new certificate, select “Add New Template.” In the Add Certificate Template Modal, begin by entering a unique template name without spaces or special characters and select the certificate type: standard, cle/multi-state, medical, certification, or multi-product (Multi-Product certificates are an add-on feature and may not be a part of your Elevate installation). Then select from the pre-existing border options or upload one of your choosing and select a color for the border. Then select the fonts you wish to use for heading and body of the template. Elevate designers can implement additional fonts if needed, contact elevate-support@gocadmium.com for these requests.

Fig.3 - Add Certificate Template Modal
In the certificate layout section, choose your desired layout for the following sections: Header, Body, Signature, and Footer.
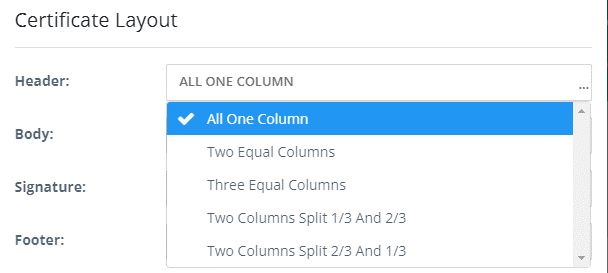
Fig.4 - Certificate Layout Section
Finally, enter the certificate content into each of the four sections using the HTML zones. You can customize the certificates with available tags based on the certificate type selected. The tags will automatically pull in user or product specific fields when used. When finished, click “Save” to save your work.
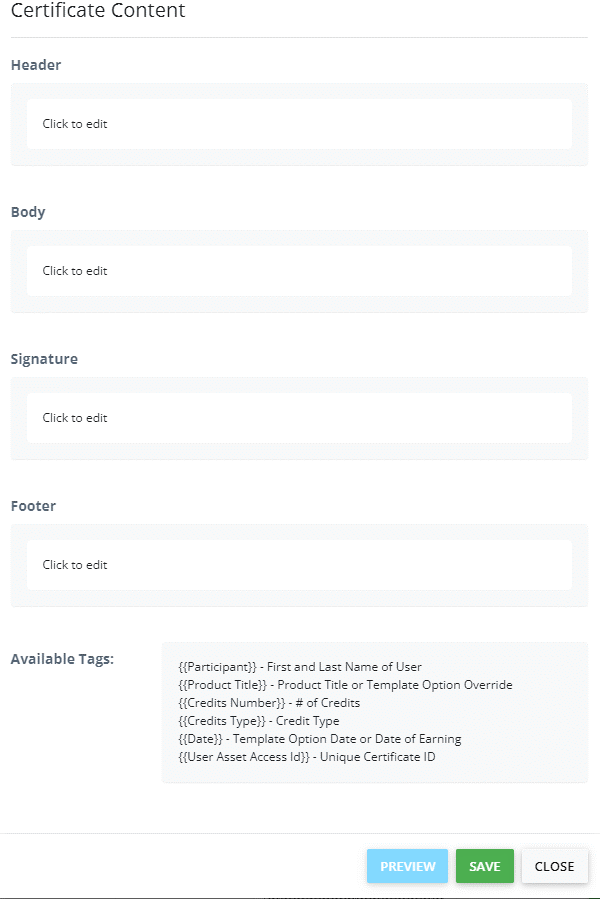
Fig.5 - Certificate Content Section
Once created, the template is ready for use. Note that any changes you make to this template will affect all uses of that template.
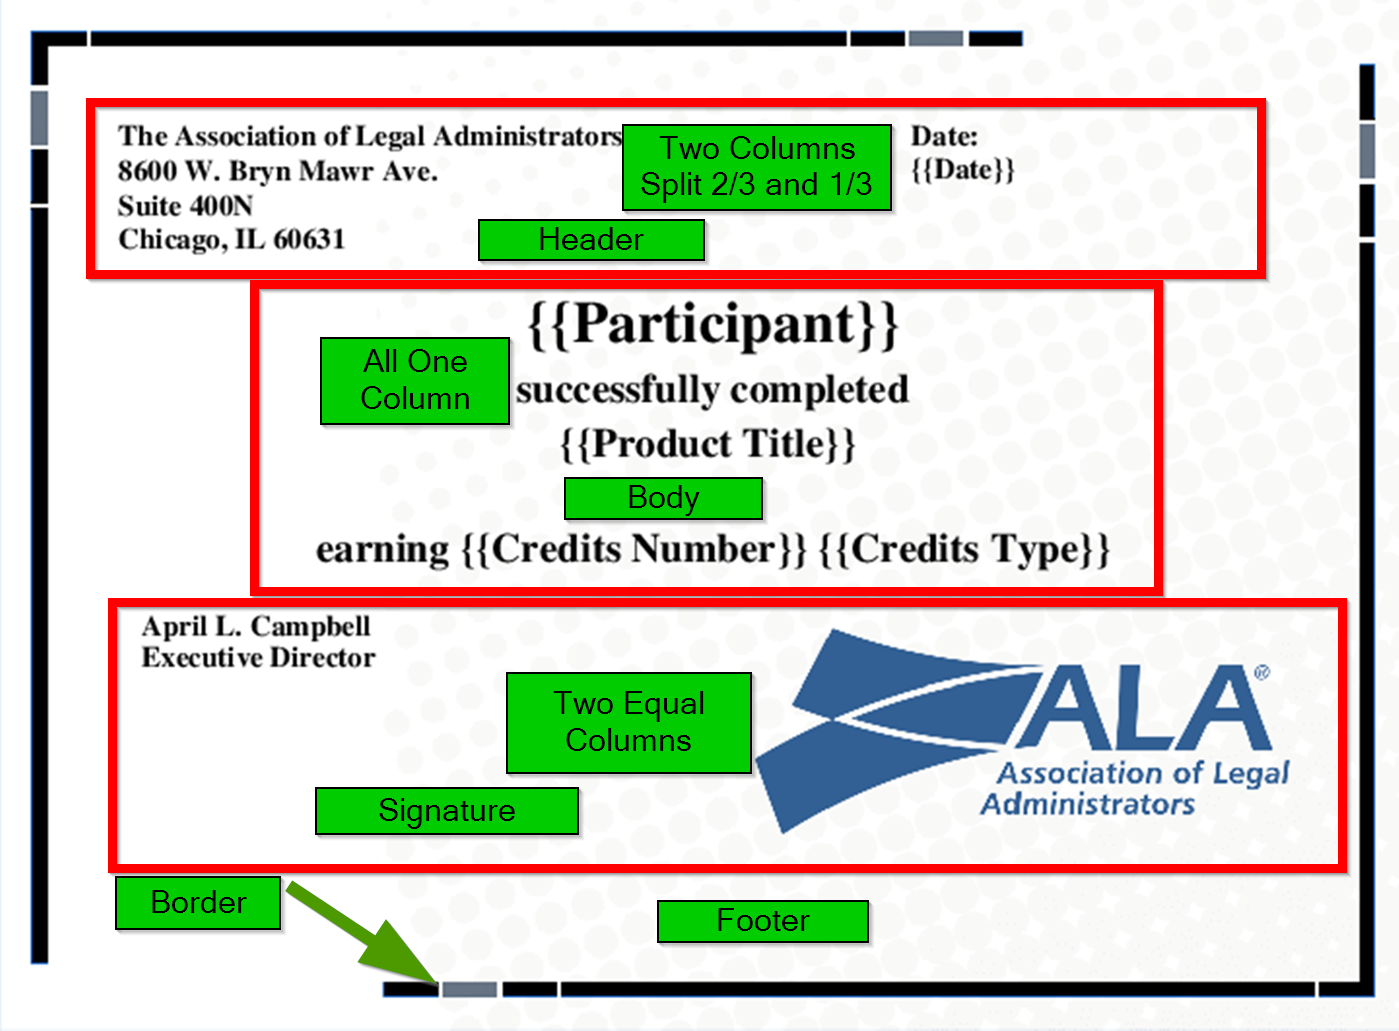
Fig.6 - Certificate Template Structure
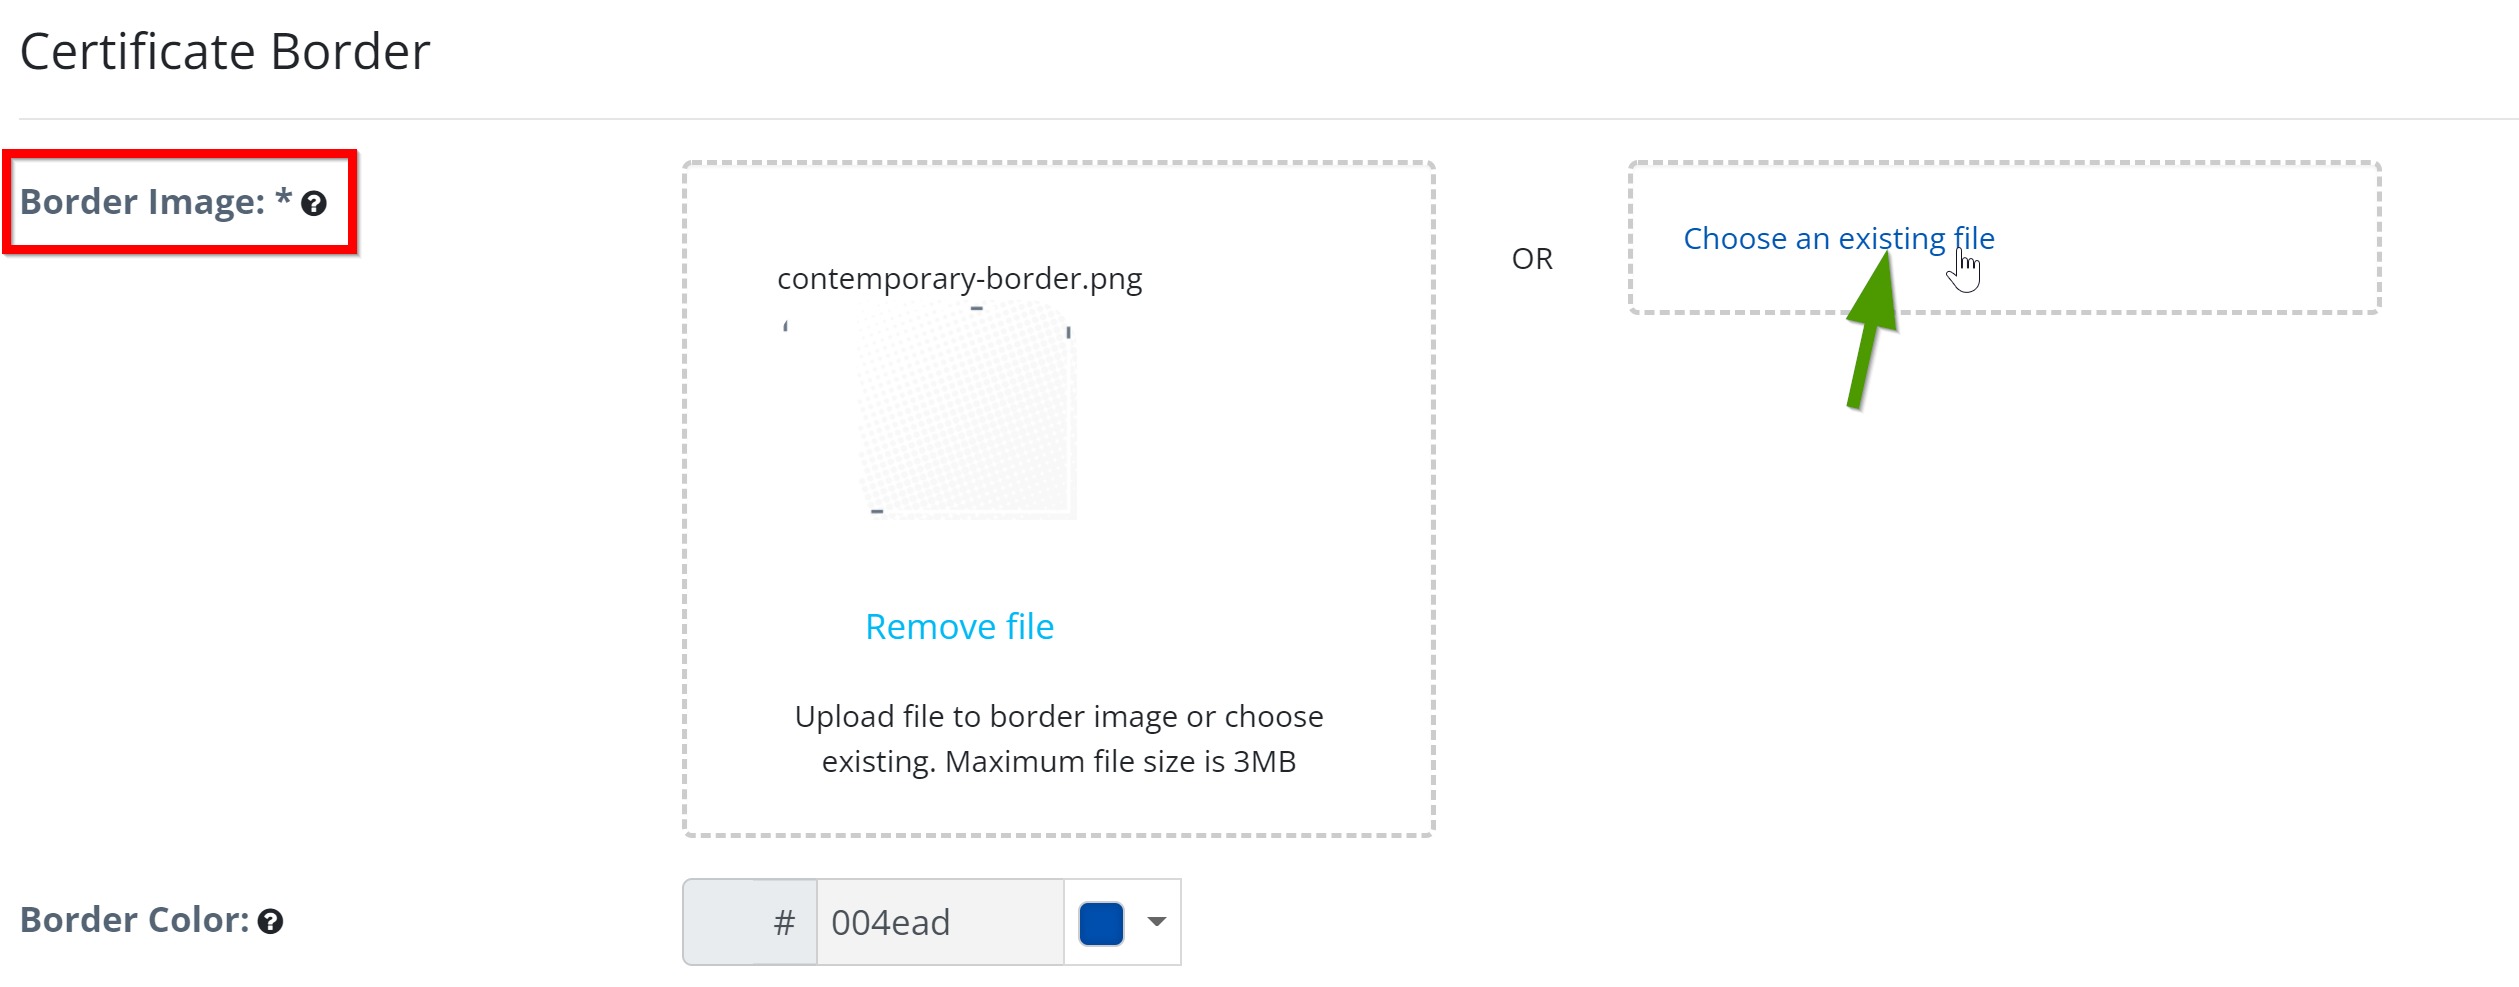
Fig.7 -
Was this article helpful?
That’s Great!
Thank you for your feedback
Sorry! We couldn't be helpful
Thank you for your feedback
Feedback sent
We appreciate your effort and will try to fix the article