- From the Administrative Control Panel, navigate to Content Management > Pages and either create the new page you would like the widget to live on or click on the button to "Edit" an existing page.
- Click on the "Add new widget to main page content" button.
What is a Project Listing Widget?
A Product List widget allows the admin to create product-specific listing on a page. When clicked on, users are directed to a specific page that contains the content. The admin can also control the number of Products that are displayed in the widget. The Product List widget can display products with the following options: Filtered – allows the admin to filter the Products listed in the widget by Category(s), Live, On-Demand or Both, Date Range and/or Key Word. The admin can also control the number of Products that are displayed in the widget. Recommended – allows the admin to filter the Products listed in the widget by the Users Interest Categories and their level of interest. User Interests are controlled by the user and can be edited by users from their "Profile" page. Popular – allows the admin to filter the Products listed in the widget by the Products with the most registrations. It will list them from most registrants to the least number of registrants. Specific – allows the admin to filter the Products listed in the widget by specifically choosing a Product or Products.
How do I add a Product Listing Widget on my site?

- Your pages are divided into 12 columns. So be sure you "size" your widget accordingly. If you want the widget to span across the entire page, give the "size" field a value of 12. If you want the widget to span across half of your page, give the "size" field a value of 6. Enter the number of rows that you want your widget to use. Keep in mind, the widget will auto-size the number of rows based on the content you have within it.
- Enter a name for your widget and check the boxes to determine if you want to display the name of the widget on your page, give it a border, or hide it from mobile or desktop devices.
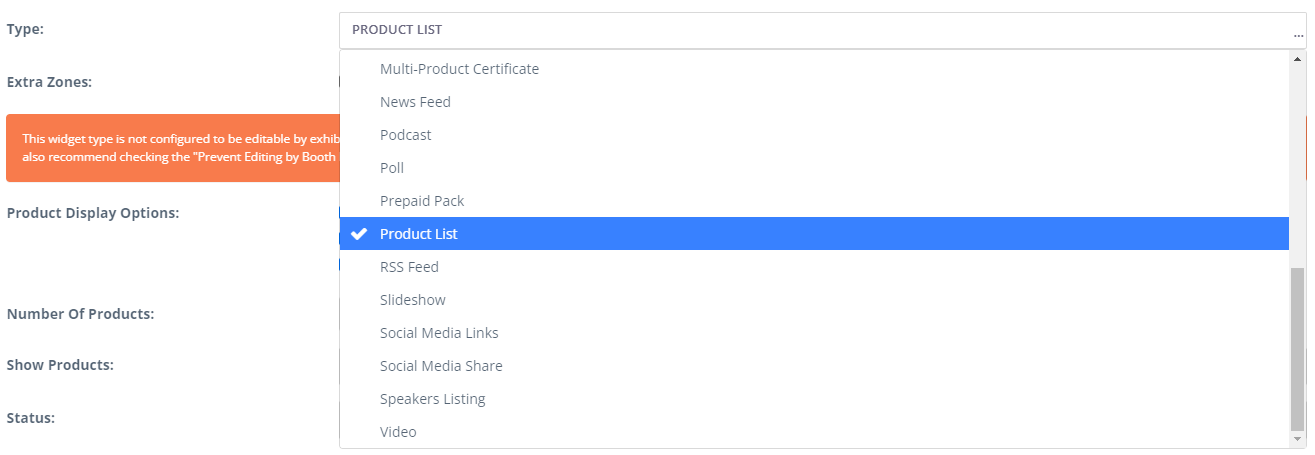
- Choose "Product List" for the widget type.
- Check the boxes related to the Product Display Options. Here you can choose what information related to the Products that will be included in the widget you would like to display in the widget.
- If your Product Listing Widget will have quite a few results, you have the option of using the pagination feature. When this checkbox is selected, only the number of products typed into the number of products field will display at any given time for the end user.

- Select what Products you would like to show in the widget. Here you can select: Filtered Products (set based on further parameters set below), Recommended Products (Products will appear based on the Interest Categories end-users have selected in their Profile), Popular Products (Products with the highest number of registrations will appear), or Specific Products.

- Select the Status of the products you would like to display in the widget from the Status dropdown menu. Note: If your Products are in "Hidden Registration" mode, you will need to select this as a status option in order for users to be able to view the products.
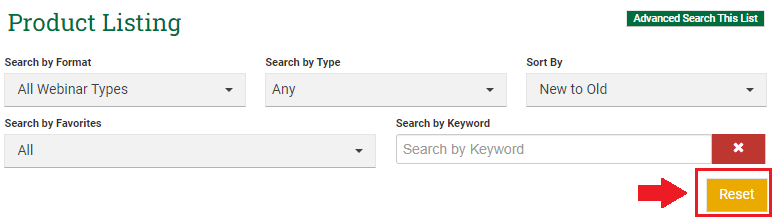
- If you would like to include a search form within the product listing, you can indicate that while setting up or editing the widget by clicking on the Search Form Visibility dropdown menu. Here you can choose where this search form will display within the widget.
- If you would like the widget to pull in products that have been tagged with specific Categories or Product Types, you can select those now or at any time.
- Finally, set the default sort by setting. Note that whatever default sort you choose here, end-users will be able to update this when they are viewing the widget.
End-users also have the ability to click a Reset button, allowing them to reset the search results within the widget.
- Once you have entered the information you wish to click "Save." This will return you to the page editor for the page you are editing. Click "Save and Stay" to save your changes.
Last modified Jun 18, 2024
Was this article helpful?
That’s Great!
Thank you for your feedback
Sorry! We couldn't be helpful
Thank you for your feedback
Feedback sent
We appreciate your effort and will try to fix the article