- From the Components tab of the Product, click "Create New Component" and select "Survey", give your Survey Component a title and description. Then click "Next Step"
This feature allows admins to create a list of questions aimed for extracting specific data from a particular group of people allowing Admins to to gather or gain knowledge.

NOTE
The title will be used on the Product page and should be something learners will recognize. For example, you may consider using the title “Survey” or “Evaluation”. The description will also be visible on the Product page. For example, if the title was “Survey” your description may be “A 5 question survey to evaluate the effective of the course”.
- Enter the number of questions that you want to display on each page in the field called “# of questions per page”
- Next, click on the Survey Questions tab to create the survey questions.


- Use your mouse to drag and drop to rearrange the question order.
- Questions can be set as required or not.

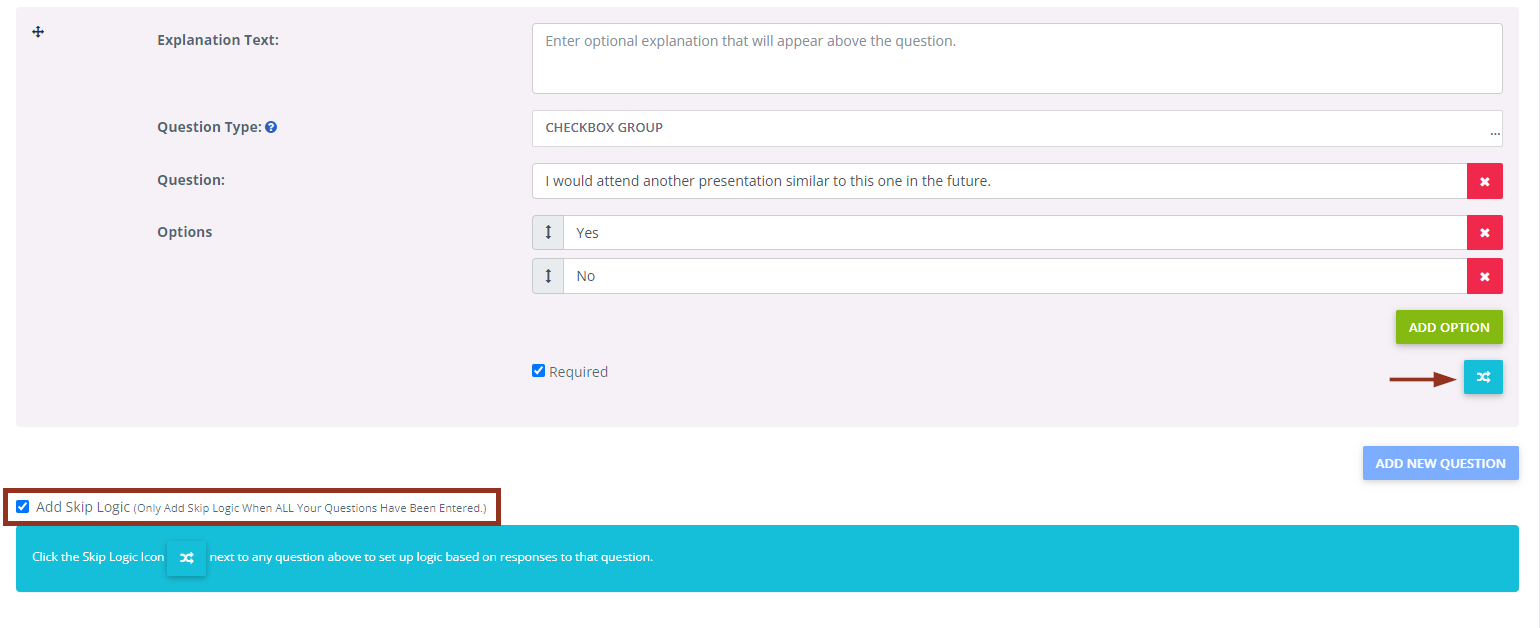
- After creating your questions, Skip Logic can be set up. After checking the box, click the Skip Logic icon next to any question to set up logic based on responses to that question.

- Click “Update” to save.
NOTE
Once users have started to complete your survey, do not change the text or questions within the text. Doing so will skew the survey results.
- Alternatively, Admins can Mass Upload Survey Questions. Only question types of text input, text area, select box, radio group, checkbox, and checkbox-group can be imported. Likert scale questions can only be added manually.
- Create a CSV file with columns exactly as defined in the Survey Question Import Fields pop-up. (Or download the sample CSV template.)

- Use the Browse button to navigate to and select your file.
- Click Upload and Review to begin the import process.
- Review your questions on the next page, then click Upload Survey Questions to finish, or Go Back to start over.
Skip Logic
Skip Logic is a feature that allows surveys to change the order of questions a respondent sees based on their answers. Skip logic is built by creating custom branching based on the learners response choice. As such, open ended question types (text input and text area) cannot be used in your branching scenarios.
- Skip Logic can be activated once all questions have been entered into the survey.
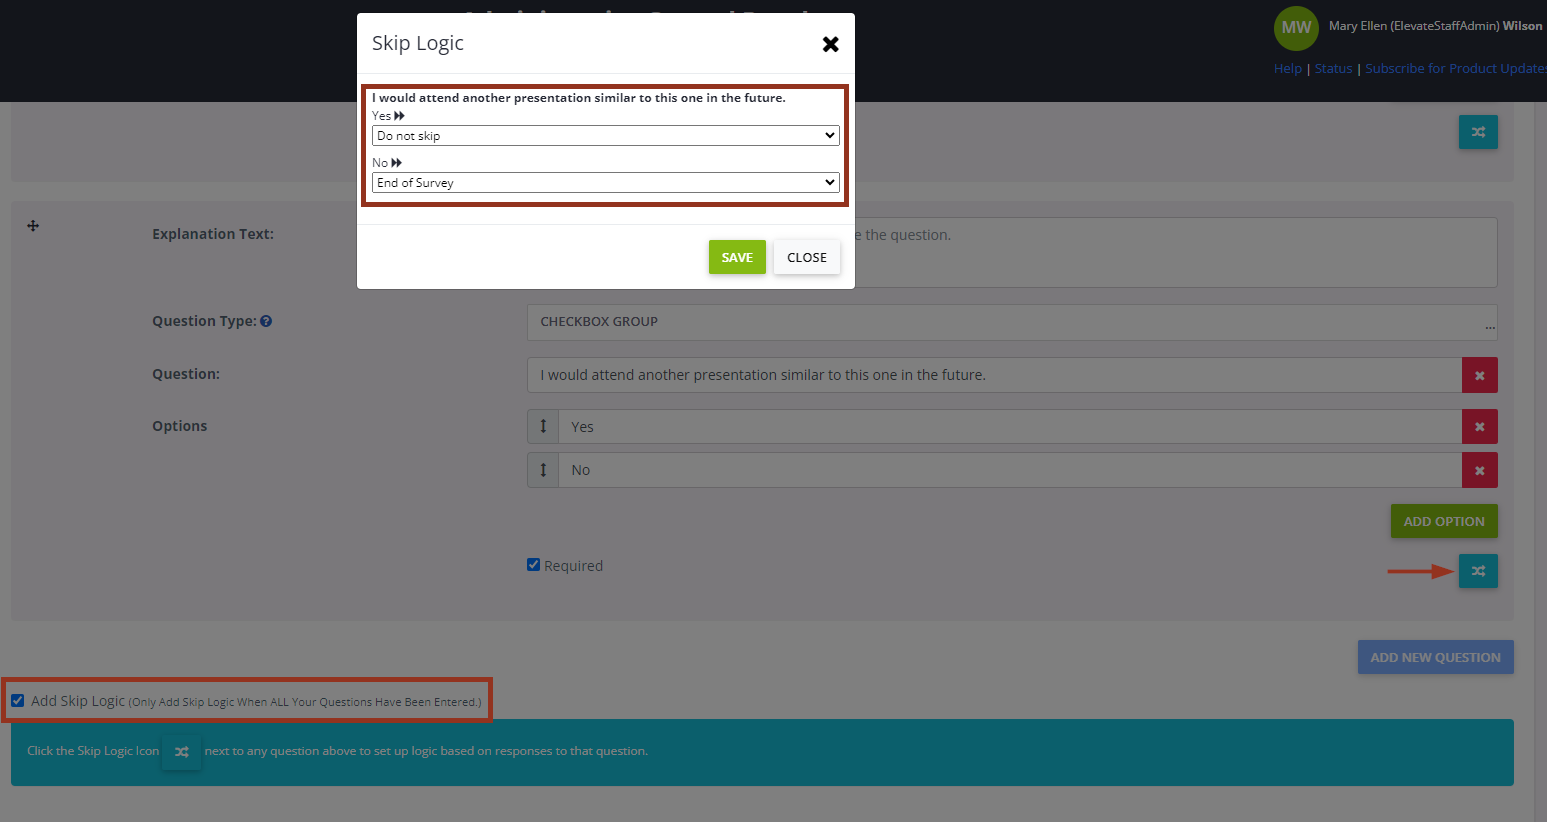
- Once Skip Logic has been activated for the survey, you can scroll up to your survey questions to create your skip logic flow by clicking on the teal arrow icon beneath the question.

- This will open the skip logic window where you will make selections on the branching path for that question. Each answer option will have a dropdown menu to make a selection on what question the learner should receive next based on that answer choice. You also have the option to send them to the end of the survey.
- Once you have established your Skip Logic branching paths, select Save.

- This process can be repeated for any other applicable question types in the survey.
NOTE
Skip logic is a site wide setting for your account. If you do not see this option, please reach out to support.
Question Type Examples
Text Input
Open-ended question that allows users to type in their answer

Text Area
Open-ended question that allows users to type in a short paragraph answer

Select Box
Allows user to select one answer choice from a drop-down menu. The 1st choice offered is the default answer.

Radio Group
Allows users to select one answer choice from a horizontal list.

Checkbox
A single box to check

Checkbox Group
Allows the user to check all the answers that apply.

Likert Scale
Set of answer options - either numeric or verbal - that cover a range of opinions on a topic

Skip Logic
Was this article helpful?
That’s Great!
Thank you for your feedback
Sorry! We couldn't be helpful
Thank you for your feedback
Feedback sent
We appreciate your effort and will try to fix the article