Admin Settings: Once the integration is set up, navigate to Products > Harvester Import > Import Harvester Presentations
Integration with the Cadmium's Education Harvester & Eventscribe Products allow for easy import of sessions, speakers, posters, and session content post conference. Quick, one-time set up, will allow client admins to lookup and select content from any Education Harvester/Eventscribe event that has already occurred as well as future events. Admins can select from those events, which sessions or posters to create as products in Elevate and customize that product import to set summary, description, pricing, categories and more. After creation of the Products, admins can additionally import content from those presentations to include, video/audio files, Warpwire content, slide PDFs, handouts, and speakers. With just a few clicks, an entire conference can be imported into Elevate as enduring content.
Please note that this is not a real time sync; the content that is found in the Education Harvester at the time of import is what is brought into Elevate. You can import additional content and assets in after the initial import.
**If you use Cadmium's Eventscribe products, please contact us at elevate-support@gocadmium.com for one time integration set up. This is a no cost, one time implementation to allow you to bring conference content into Elevate.**

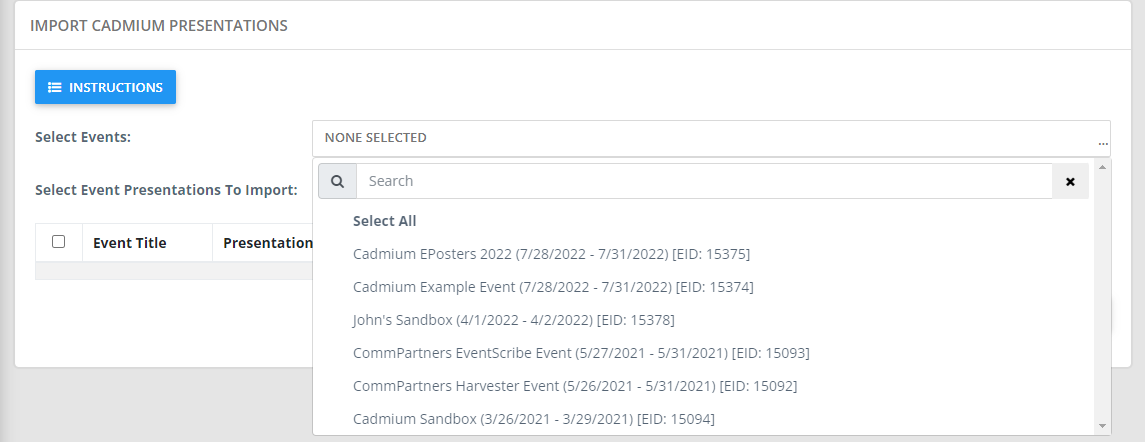
- Select the event(s) you wish to import presentations or posters from:
- Select which presentations you wish to import by clicking the checkbox next to the presentation name.
- Select IMPORT AS PRODUCTS. The import Harvester Presentations pages that lists the presentations includes presentations dates and times, as well as Harvester Build Codes, helping you to easily identify which presentations or posters you would like to import as Products.

- Once the "Import as Products" button has been clicked, a modal will appear allowing you to customize what information is displayed in the newly created Product(s) in Elevate.
- Select whether you would like the presentation title, session name, or course name to be used as the Product Title in Elevate. The option you select will be dependent on your naming conventions for presentations and posted in the Education Harvester.

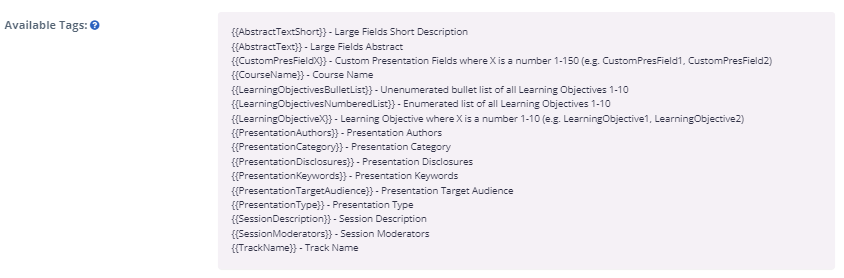
- Input specific text or one or more of the tag fields into the Product Summary field. If you are using an available tag, ensure you are using the tag that corresponds to the information you input into the Education Harvester.
- Input specific text or one or more of the tag fields into the Product Description field. You have numerous tags available to you to use, which all correspond with specific fields from the Education Harvester.
- Input the Start Sales At and End Sales At dates by clicking on the calendar picker icon. If you have no end sales date, select the "No End Sales" checkbox.

- Select as many or as few Categories and Product Types you would like to assign to the presentations and/or posters you are importing.
- Select a Remote Accounting Code from the dropdown menu if you are using them.
- Select the Accounting Date if you choose.
- Select as many or few of the Social Networking Sharing Links you would like to include.

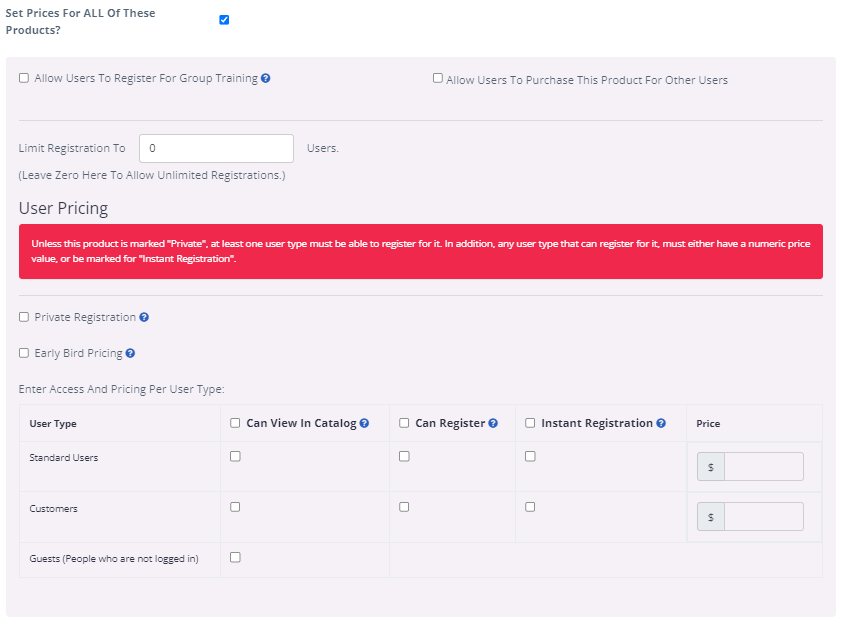
- If you would like to set pricing for these Products, you can do so now. If the "Set Prices for ALL of These Products" option is selected, you will be prompted to input pricing information. Pricing information displayed here will be the same pricing information options you have from within each of your Products.
- Once you have input all applicable information, click the "Import Presentations" button, which will take you to a page where you can view, edit, and select content types that will be imported.

If you would like to do an initial preview of the important presentations, select the Preview icon after the presentation import to see what content is available to import from the Harvester for that presentation (Fig. 1)


Fig. 1 - External Content
- From within the Presentation Content Import section, select the content types you would like to import to the Products.

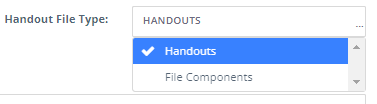
- If you are importing Slide PDFs, select whether you would like these to import to Products as a Handout to the Handout Tab or as a File Component.

- If you are importing handouts, select whether you would like these to import to Products as a Handout to the Handout Tab or as a File Component.
- If you are importing Posters, select whether you would like the posters to import to Products as a Handout to the Handout Tab or as a File Component.

- If your presentations have presenters, select whether you would like presenter information to import in and add presenters as a Speaker to the Product.
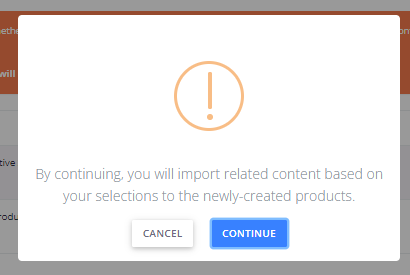
- Once all settings have been put in place, click the "Import Presentation Content." In doing so, you will receive a notification letting you know that by continuing, content will be imported based on your selections to the newly created Products. Click the "Continue" button to proceed with importing the content.
Once your content import selections are made, you will receive a confirmation page displaying all the newly created products, overview of what was imported to those products and actions buttons to edit those products.
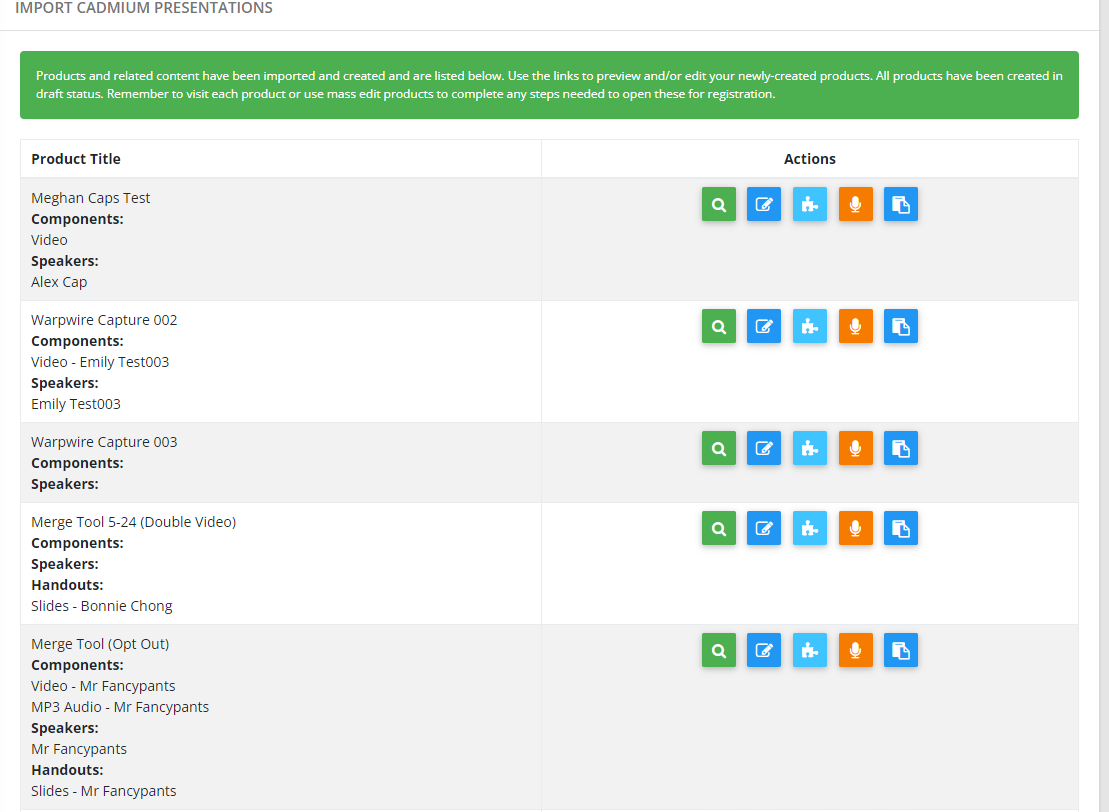
Once your import of presentations and content is complete, be sure to check the products and make final adjustments. Products created during the import process can be found on the product listing on your site.
Last modified Sep 18, 2024
Was this article helpful?
That’s Great!
Thank you for your feedback
Sorry! We couldn't be helpful
Thank you for your feedback
Feedback sent
We appreciate your effort and will try to fix the article