- Navigate to Products and select Import Harvester Presentations.
IMPORTANT NOTE
WE DO NOT RECOMMEND IMPORTING YOUR PRESENTATIONS UNTIL YOUR EVENT HAS PASSED OR UNTIL ALL CONTENT HAS BEEN FINALIZED The importing process is NOT a live sync. Once presentations have been imported, any edits made to them on your Harvester/Eventscribe site will also need to be made on your Conference365 site.
An integration between your Harvester/Eventscribe website and Conference365 site has been set up. To import your presentations and corresponding pieces of information use the following steps.

- On the Import Harvester Presentations page, select from the drop-down menu one or multiple of your events.

- Once you have selected the Event(s), Conference365 will fetch and present all presentations from that event(s). This may take a few seconds to process depending on the number of presentations you have.
- Select some of all of the sessions from that event(s) that you wish to import as products and then select the green "Import As Products" Button.

- A modal will then appear on your screen to allow you to customize your import.

- Click on the "Product Title" dropdown menu to select the name that the product will be titled when the presentation imports.
- Copy and paste the Available Tags to customize the Product Summary and Product Description.
- Update the Start Sales At and End Sales At dates (this is when the products will be available for users to register) or select the “No End Sales” option.
- Tag the presentations being important with any Categories or Product Types. Whatever Categories or Product Types selected here will apply to app presentations you are importing. If you would like to tag presentations with specific Categories and Product Types, you can do so once presentations have been imported.
- Select any social network icons that you would like to display on products pages for users to share your products via the “Social Network Sharing Links” dropdown menu.
- If you would like to set pricing for all presentations being imported, select the checkbox next to “Set Prices for ALL of These Products?”
- Once you have updated all applicable information, click the “Import Presentations” button.
NOTE
If you do not set pricing for your products, your products will by default be set to “Private Registration” meaning that the only way a user would be able to register for the product would be via manual registration by an admin for the site. This can be updated after the products have been created.
- After import you will be redirected to an Imported Products page where you can preview or edit all of the imported products.
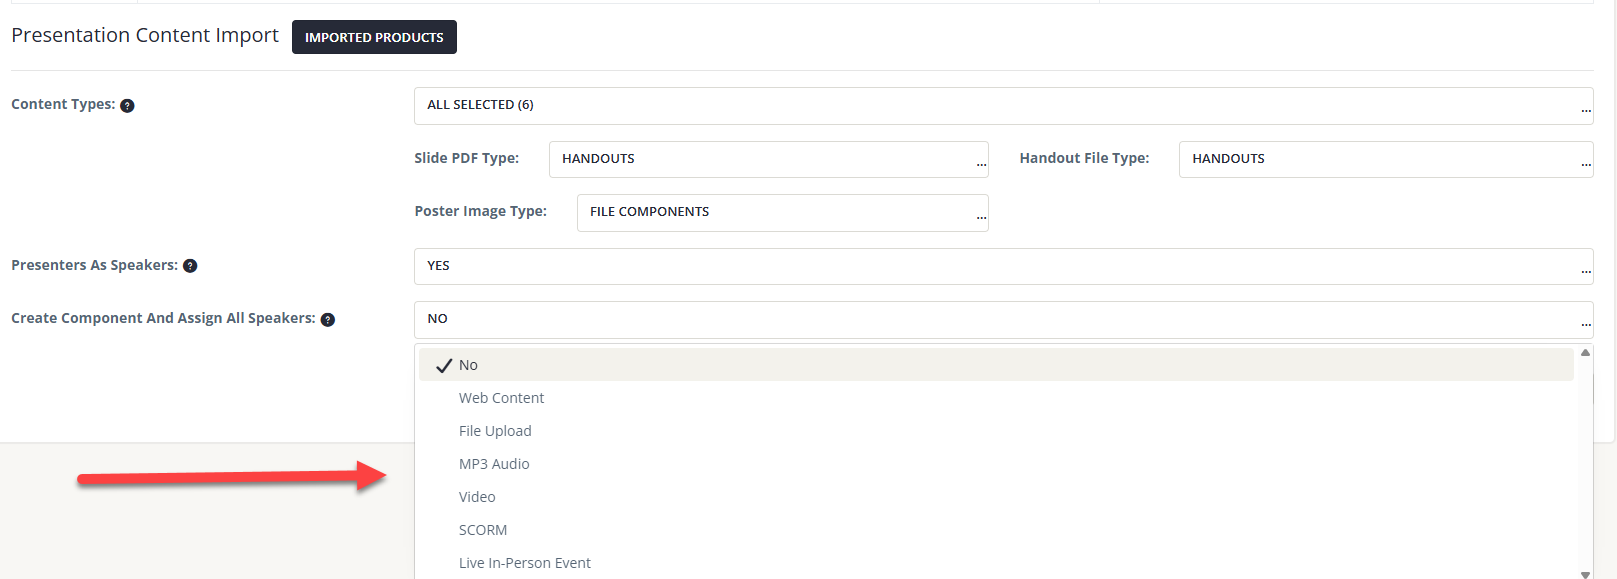
- The screen will also include a section labeled “Presentation Content Import” where you can select which content (I.e. recordings, slides, handouts, speaker information, etc.) from the presentations you would like to import. If you would like to import presentation content:

- Select the type of content you would like to import from the Content Types drop-down. Content that can be imported for each Presentation from Eventscribe will be added to Products in the following formats:
- Main Presentation Video - Video Component
- Main Presentation Audio - MP3 Audio Component
- Presentation Videos - Video Component
- Slide PDFs - Admin can decide to import as a product handout or as a file component
- Handout Files- Admin can decide to import as a product Handout
- If you have selected Slide PDFs or Handout Files you will be asked whether you would like these items imported to the Handout Tab for the product, or as a File Component. Select “Handouts.”
- Select “Yes” or “No” from the Presenters as Speakers drop-down if you would like to import the speaker information for your presenters.
IMPORTANT NOTE
Choose to automatically create a minimal (shell) component during import, allowing all presentation speakers to be assigned even when no component exists in the destination product. This enables teams to manage speaker data in advance and configure webinar or content components later in Elevate. This update improves flexibility for teams using Education Harvester primarily for speaker management while configuring content separately within Elevate.
- Once you have selected all applicable options, click the “Import Presentation Content” button. When prompted, click the “Continue” button to continue importing your presentations.
- Once your content import selections are made, you will receive a confirmation page displaying all the newly created products, an overview of what was imported to those products, and actions buttons to edit those products.

- Once your import of presentations and content is complete, be sure to check the products and make final adjustments. Products created during the import process can be found on the product listing on your site.
Last modified Apr 08, 2026
Was this article helpful?
That’s Great!
Thank you for your feedback
Sorry! We couldn't be helpful
Thank you for your feedback
Feedback sent
We appreciate your effort and will try to fix the article