FIG. 1 - Admin messaging settings
Available on request and for a fee, Elevate’s Connect Module includes a variety of tools to help initiate and support community interaction.
The Connect Module specifically allows for:
For more information on the Connect Module, please reach out to your account manager or email us at elevate-support@gocadmium.com.
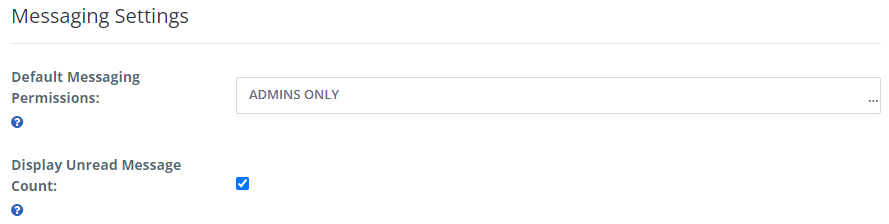
Once the Connect Module has been turn on, Admins can access the default messaging permissions by navigating to Settings > Site Setup > General. Here you can select by default who is able to message an end-user. This default permission will remain in place until the end-user logs into their profile and updates their messaging permissions. You can also optionally choose to display the unread message count for end-users.
FIG. 1 - Admin messaging settings
By default, once the Connect Module has been activated, a sitewide user directory is also activated. This is an uneditable page that can be found on your site using the URL http://insert-your-subdomain.com/user-directory
Only users that have opted in to being listed within the user directory will be listed or can be found when searched for.
If a user has opted in to being listed in the directory, but has not opted opted into receiving messages, other users can find them in the directory, but will be unable to send messages as shown below.

FIG. 2 - User Directory showing messaging options
Once activated, end-users will have additional privacy and messaging settings that can be accessed and updated via their Profile. They can choose which pieces of information will be displayed in which locations, add additional networking information such as social media URLs, and more.

FIG. 3 - User's profile privacy and messaging settings
Within the Messaging Settings tab, end-users can control who is able to send them a message, they can search for and add other user contacts, and they can block users.

FIG. 4 - User's profile of the messaging settings
Users can send and receive messages by clicking on the "My Messages" option from the dropdown menu under their name once they have logged into the site. If you have opted to include a message count from within your site settings, users can easily see if they have a new message. Users will also receive an email notification when a message is received.

FIG. 5 - User account menu options
Once within the My Messages area of the site, users have the ability to read any existing messages, send new messages, manage their contacts, and edit their profile.

FIG. 6 - User's My Message
Was this article helpful?
That’s Great!
Thank you for your feedback
Sorry! We couldn't be helpful
Thank you for your feedback
Feedback sent
We appreciate your effort and will try to fix the article