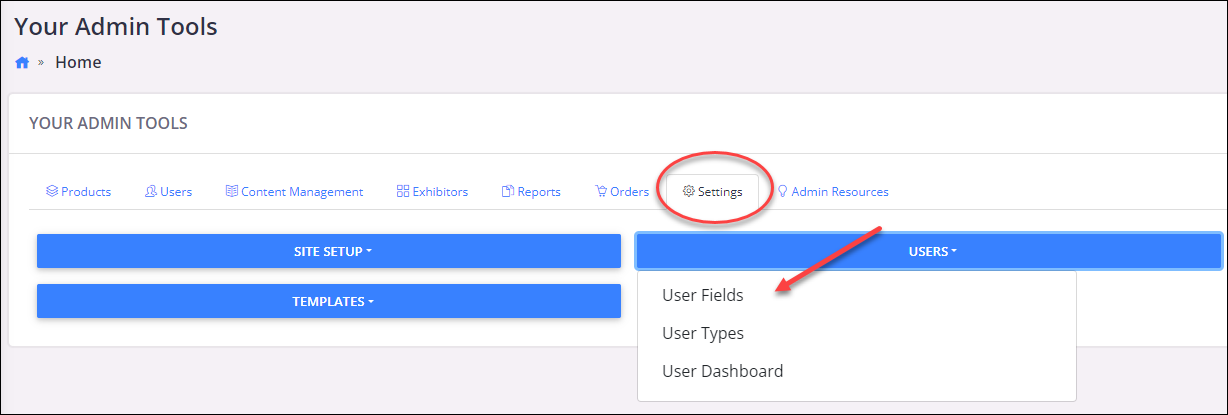
- From the Administrative Control Panel, click on the settings tab and select “User Fields”. This page will allow you to control which user information fields are displayed, and which are required on several areas throughout the site. Hover over each title to see more information on where that form appears. You may also use this page to create extra custom fields, and to change the order in which the fields show up on forms.
A user's profile is where user specific information is stored. Elevate has several fields that can be assigned to a user profile and Elevate administrators can add their own custom fields. Administrators can make user fields mandatory or optional.
Elevate Pre-defined User Fields
- Use the Checkboxes in each row/column to make that item required or to have the field shown. The password field is always required as is an identifier which is usually the user's email or username. Options that are grayed out cannot be modified.

- You can rearrange the order of the items by clicking on the arrows and dragging the item up or down the list.
- If you wish to create a custom field, scroll down to the bottom of the page to “Add Custom Field” and click on that button.
- In the popup window, enter the field name in the text box and select the field type with the dropdown menu.
- Enter the appropriate information in the fields if given. (Fields will only be generated with the Likert scale, Checkbox Group, Radio Group, and Select box)
Click on the “save” button to save the custom field.
Last modified Jun 13, 2024
Was this article helpful?
That’s Great!
Thank you for your feedback
Sorry! We couldn't be helpful
Thank you for your feedback
Feedback sent
We appreciate your effort and will try to fix the article