- Once you are in the booth administration area, you will see a menu listing all the actions you can take related to your booth. The options you see in the menu will depend on what content the admin allows you to add to your booth.
Use this to guide to log in as an exhibitor manager to edit your exhibit booth and access booth reporting. The site administrator will contact you when access to your exhibitor manager login is available and your booth is ready to be set up.
Use this link to view a Booth sample.
NOTE
The Exhibitor Hall Module is a separate, paid, add-on module. To get information and pricing about this module, contact elevate-support@gocadmium.com or contact your account manager.
Step 1- Logging in as an Exhibitor Manager
The site admin will send you a direct link to the conference website or your exhibit booth. Included in this email will be your login credentials – be sure to save your credentials in a safe place. Once you have received the link, paste it into your browser and navigate to the login section of the site. The most common places for the login area are in the left/right hand sidebar or in the top banner. Look for an area that looks similar to the sample provided below.
- Once logged in, click the down arrow next to your name and select Booth administration (Fig. 1).

FIG. 1 - Account menu upon logging in
NOTE
If you do not see this option in your menu, contact the site admin to add you as an exhibit manager. You need this permission to be able to edit your booth and view booth reports.
Step 2- Set up Your Booth
Your Exhibit Booth is a webpage with a set of pre-defined content areas called widgets which you will use to add your booth content.
NOTE
There may be some widgets that you cannot edit due to the site admin restricting access. Contact the site admin with any questions.

- Click on Edit Booth page and you will be taken to your booth page to edit the booth content.
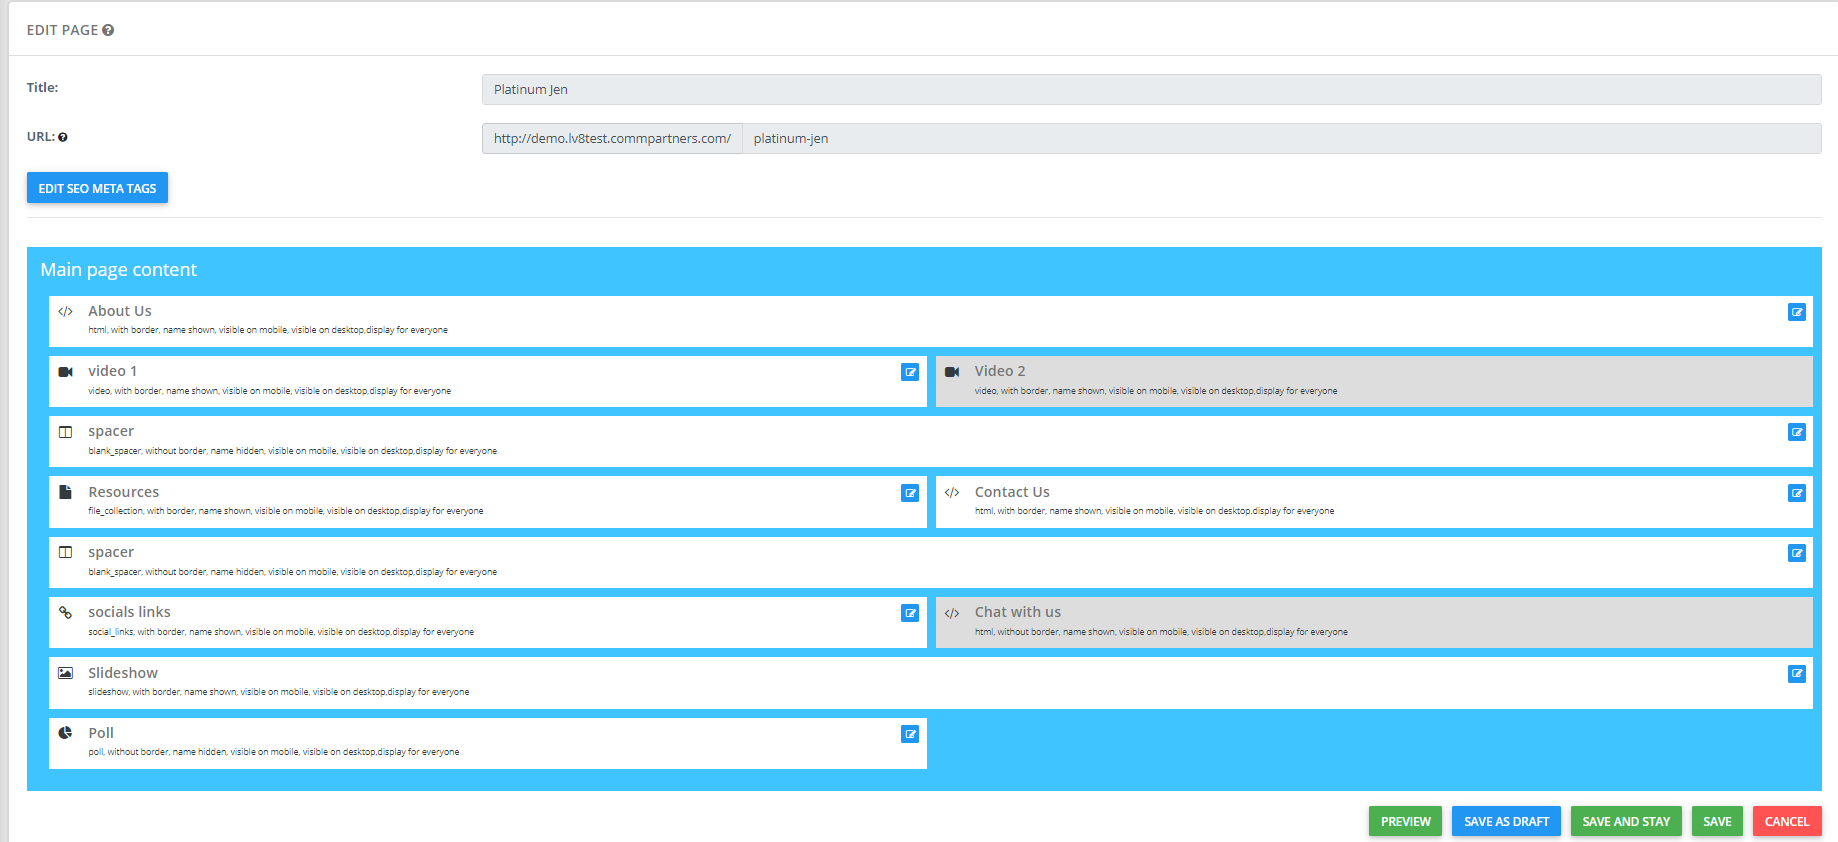
- Click on the blue edit button to add content to each section. If you do not see this edit icon and the widget area is greyed out, this means the site admin has prevented you from editing that section. The widgets available to you to edit were assigned by the site admin. If you need additional areas added, you must contact the site admin directly.
- When you are editing your page, you must remember to save both the page widget and the page itself to save your work.
You have the following Page Management Options:
- Preview: to view the booth page how an attendee will see the booth content.
- Save as a Draft: to save a draft of your booth which is not visible to the site visitors. Once draft is finalized, you can publish the draft to make it accessible to the visitors
- Save and Stay: to save your work and continue editing the page.
- Save: to save you work and close out page editing.
Your Booth Options may include the following:
HTML widget allows you to enter and format text, images, videos, buttons etc.
- To edit use the HTML editor to add and stylize text, images, graphs, buttons or videos.
Optional: edit the widget name and display options.

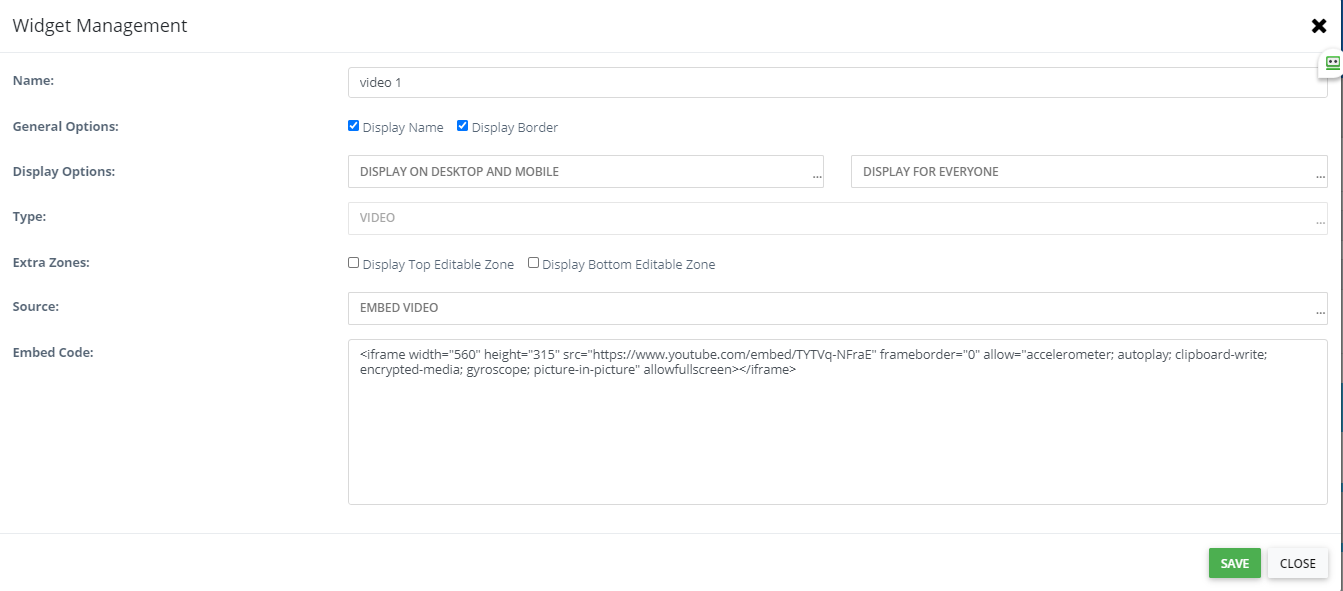
Video widget allows you to embed a YouTube or Vimeo video (Also supports similar platforms) or upload an MP4 video.
- To edit optionally edit the name, general options and add any extra HTML zones above or below the video. Under source, select embed or upload video. For embed, copy the youtube, vimeo or similar embed code. For upload videos, drag your MP4 video file into the drop zone. Videos must be in MP4 format and no larger than 1GB.
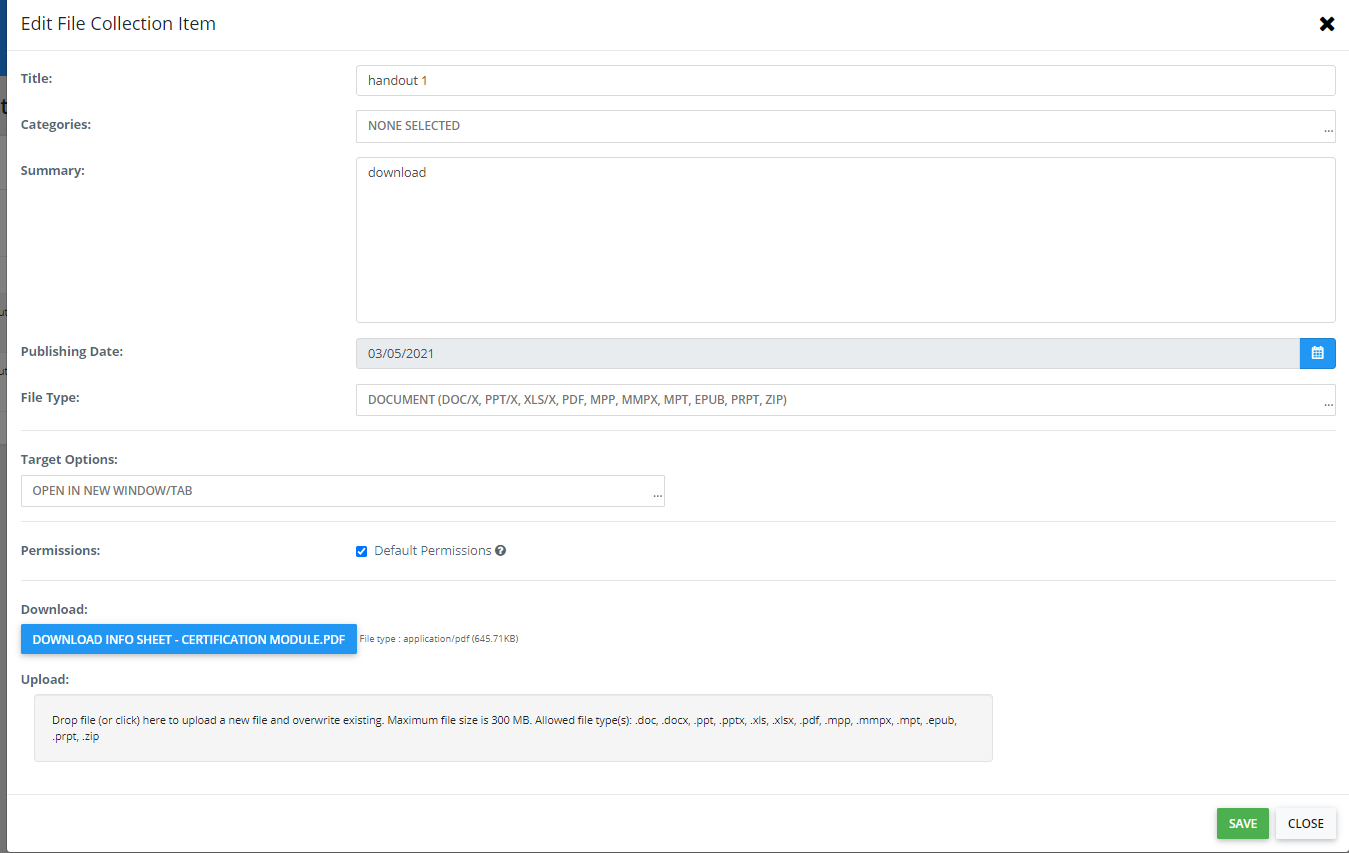
Resources (File Collection) widget adds booth resources of the following types: Doc/x, XLS/X, DF, MPP, MMPX,, MPT, EPUB, PRPT, ZIP
- To edit, select Edit File collection from the menu and use the Create New Item button.
- Add a title and summary (required) to your item. Optionally, you may add a publishing date, select the file type, and set the target options. Once you have done so, drag and drop your file in the upload zone and wait until the file upload is complete – it should only take a few moments – then, click Save. Repeat this process for each resource item you add.
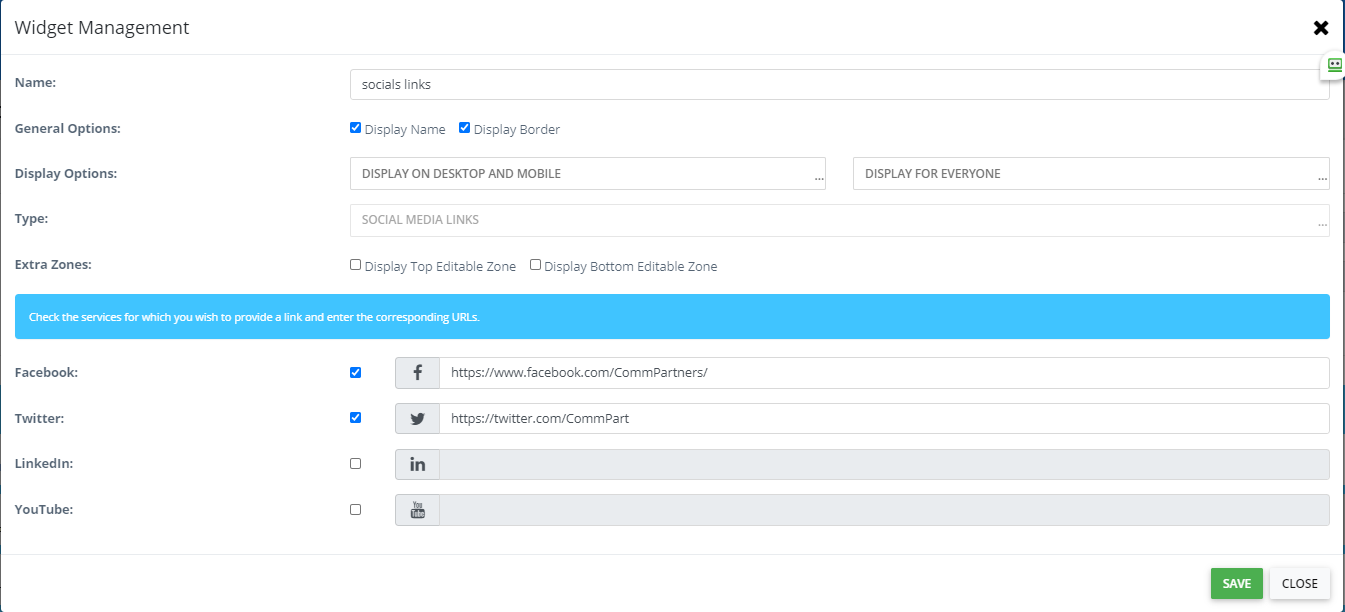
Social Links widget adds links to your companies social networks Facebook, Linkedin, YouTube
- To edit, check the boxes for each social media link you wish to add, then copy the sharing link into the field. You have the option to edit the name and general options, and add top or bottom editable zones – these editable zones are HTML editors. Once you are done, click save.
Slideshow widget adds images set to carousel every few seconds. You have the option to give each image a weblink/URL. This will allow viewers to click on the image which will redirect them to the specified URL. Be sure to include the “http://” to your link
- To edit, set a delay in whole seconds and check the box if you would like the slideshow to have captions. Then use the upload area to upload the images one at a time. Once the images are loaded, you can optionally add in a caption and link. Click save when done.

CADMIUM RECOMMENDS
It is recommended to use images that are all the exact same size for the slideshow.
Polls widget adds a polling question to your booth
- To edit, from the booth administration, select edit poll then select edit on the poll.
- Enter your poll question, select a poll type, then enter and add your response options.
- Add a date range to allow responses during a set time period (Meaning responses will be open from 5/1/21 to 5/5/21)- this should be the dates of the conference.
- Select the user types that will be able to view and vote on the poll. Then Click save.

Contact Form widget adds a contact form with customizable required and optional fields that, when filled out, sends an email to contact(s) defined by the widget creator.
- To edit, first, determine the form submission recipients by entering their email address(s) on each line. These are the individuals who will receive the notification of each form submission. Then, customize the confirmation message the user sees upon form submission.
- Next, choose your form view option – either Modal (popup form from a button) or embedded form. Once you have chosen the view option, you may customize the prompt button and/or submit button text.
- Finally, customize your form by editing, adding, or removing form fields. Click on existing form fields to edit or remove existing form fields. To add a new form field, click on the form file types on the right hand side. Once you are done, click on save.

External Asset Widget is another html widget but preset with a button to link to a 3rd party tool. This could be used to link to exhibitor provided Zoom, webex, or skype room. Alternatively, this could be used to link to a sponsored session, booth giveaway, or raffle.
- To edit, select the button icon in the HTML zone. Then set Button text, URL, Target, Style and Size and click save when done.

Step 3- Access Booth Reports
During or post conference, exhibitor managers can access reports of booth visitors and file downloads. These can be accessed from the booth administration menu or from the buttons at the top of your booth page.
File Access Report
This report will show you the summary of file views/downloads or the user details of who viewed/download the resources added to the file collection in your booth. You can edit the date range, switch between detail and summary views. You also have the ability to download the report as a csv file (Fig. 2).

FIG. 2 - File access report
Last modified Jun 13, 2024
Was this article helpful?
That’s Great!
Thank you for your feedback
Sorry! We couldn't be helpful
Thank you for your feedback
Feedback sent
We appreciate your effort and will try to fix the article