This function is not global, but can be turned on at your request at no extra fee.
A prepaid balance allows administrators to issue credit of a specific dollar amount to users that can be used for future purposes. Similar to gift cards, administrators can issue dollar amounts which can be used towards/on any product within the site. Prepaid balances could also be used to issue membership renewal thank-you, for example, if users renew membership early, they get a $50 credit on the site.
The user's balance is displayed and can be used during the checkout process. User can also view their balance on their Dashboard. There are 3 Ways to Grant Prepaid balances: Grant to individual user, Grant to uploaded list of users, and Grant by member type.
Grant prepaid balances to individual users

- From the Administrator Control Panel - Users tab , select Grant Prepaid Balances from the prepaid balances button.
- From the Grant to Individual User tab, enter a user’s name or email into the “First/Last Name or Email” Search field.
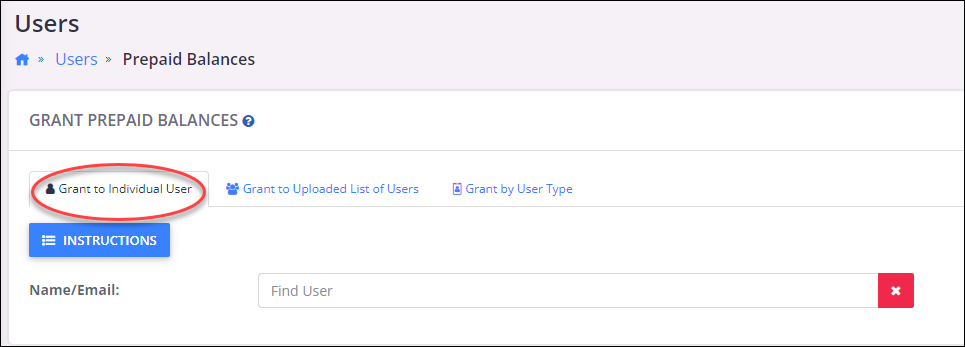
3. The users current balance will be displayed with the transaction date, transaction type, amount and paid.

- Grant More will give options to grant a specific dollar amount. The Amount Paid is the amount, if any, that a user paid, outside of this site, to receive this balance. Leave "Amount paid" at zero if this is simply a grant of free credit. Use the description field to describe the grant. The example above illustrates granting a user $50 for winning a raffle.
- Reduce Balance will reduce the user's prepaid balance by a specific dollar amount.
Grant to Uploaded List of Users
This function is used to grant a prepaid balance to multiple users at the same time.
- Create a .csv file with one User ID or Email Address per line, and save it. If using IDs, use the ID in your AMS or database, which is imported with CSV or SSO as the "Remote User ID".
- From the Administrator Control Panel - Users tab , select Grant Prepaid Balances from the prepaid balances button.
- Select the Grant to Uploaded List of Users tab.
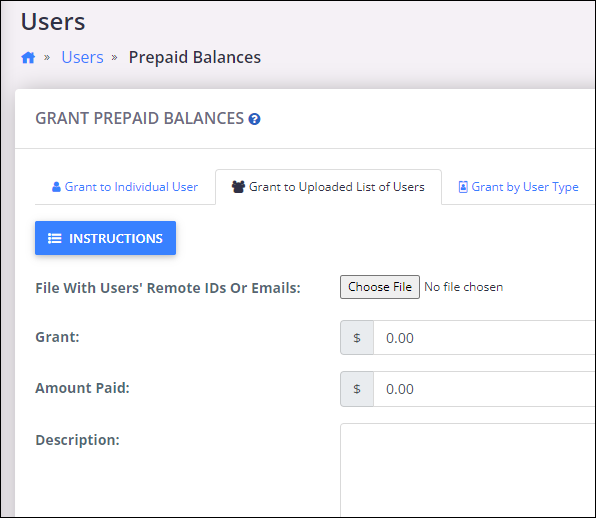
4, Use the Choose File button to upload the .csv file created in step 1.
5. Enter a specific dollar amount in the Grant field that all users will receive.
6. Amount Paid is an optional field to use if the users paid, outside of this site, to receive this balance. Leave this at $0.00 if you are granting free credit.
7. Optionally, enter a description for this transaction in the description field.
8. Select the Import and Review button at the bottom of the screen.
9. Follow the prompts to review the users you have granted the balance to. If you want to grant the prepaid balance, select the Grant button.
Grant by Member Type
- From the Administrator Control Panel - Users tab , select Grant Prepaid Balances from the prepaid balances button..
- Select the Grant to Uploaded List of Users tab.
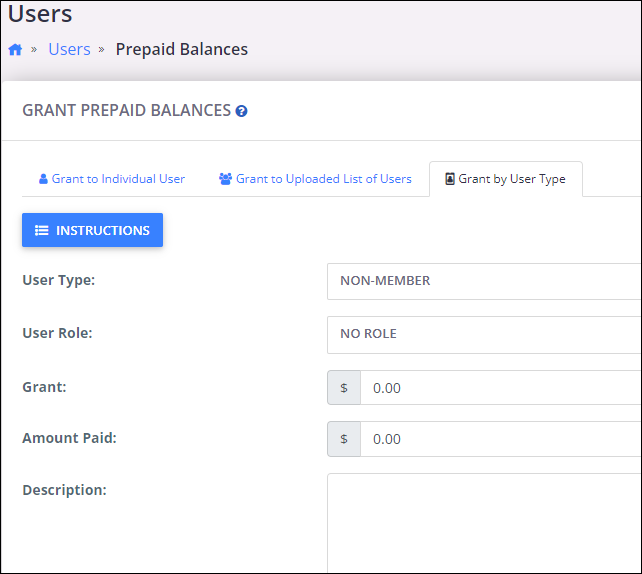
3. Select the member type and user role from the corresponding fields.
4. Enter a specific dollar amount in the Grant field that all users will receive.
5. Amount Paid is an optional field to use if the users paid, outside of this site, to receive this balance. Leave this at $0.00 if you are granting free credit.
6. Optionally, enter a description for this transaction in the description field.
7. Click on Review to see to whom the balance will be granted to. If you wish to proceed, click grant to grant the prepaid balance.
NOTE
In order to grant prepaid balance, User must have an active account on Elevate.
Was this article helpful?
That’s Great!
Thank you for your feedback
Sorry! We couldn't be helpful
Thank you for your feedback
Feedback sent
We appreciate your effort and will try to fix the article