Feature Description:
Elevate comes with a number of sitewide email templates. While not all email templates will need to be updated, as many will not be sent from your site, we do recommend reviewing email templates and updating them to accurately reflect the messaging for your organization. An email will only be sent when a user takes a specific action, such as registering for a product or package; or when it is triggered by something such as a product expiring. We recommend at a minimum reviewing the “Registration Confirmation” email.
Note about updating sitewide email templates: If you update any of the sitewide email templates, any Product or Package using that email template will have the template updated as well. Email templates can also be edited and customized on the individual Product or Package level. If you edit any email templates at the Product or Package level, sitewide email template updates will NOT override the edits you have made within individual Product or Packages.
1. To edit the side-wide email templates, navigate to Settings > Templates > Email Templates.
2. Towards the top of the page, you will notice a "Confirmation Email Options" button. When clicked, you are given the ability to turn off confirmation emails only and/or remove the pricing table for confirmation emails.
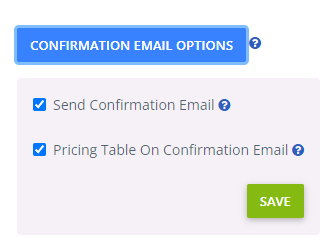
Fig.1 - Confirmation Email Options
3. Select the “Edit” button within the Actions column for the email you wish to update. This will induce a pop-up window that includes the text for the email. A few notes about the email editor:
- The top of this pop-up window includes a description of when this specific email template would be sent to end-users.
- Each area of the email editor includes buttons labeled "Use Default." When clicked, this will revert any updates made to the email template to the original text included.
- You may insert tags into your emails by scrolling to the bottom of the page. Here you will find numerous tags that are divided into categories. Copy and paste the tags into the text fields or text editors to use them. Only use tags for each email that are found within the available tags information within the email editor.
- Your email can be previewed at any time by clicking the "Preview" button just above the listing of tags for the email.
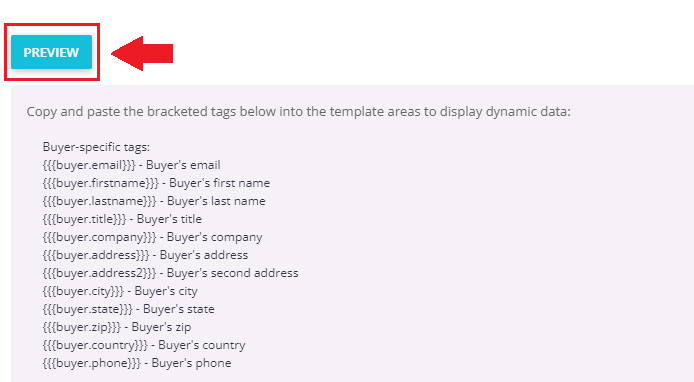
Fig.2 - Email Preview Button
4. Update the Email Subject if needed.
5. Update the text included in the Heading area if you choose. A reminder that you may insert tags into your emails by scrolling to the bottom of the page. where you will find numerous tags that are divided into categories. Copy and paste the tags into the text fields or text editors to use them. Preview your email by clicking on the "Preview" button above the available tags.
6. Once all applicable changes have been made, click the "Save" button to save your changes.
IMPORTANT NOTE
A new setting and related site-wide and product-specific email template has been added which will allow an admin to send an email to the learner upon completing the product. Product completion is defined by the Required for Completion checkboxes in the component set up. The Notification of Completion setting is located on the Time Limit/Expiration tab within the product.

Fig.3 - Email Notification Setup

Fig.4 - Email Templates Section
Was this article helpful?
That’s Great!
Thank you for your feedback
Sorry! We couldn't be helpful
Thank you for your feedback
Feedback sent
We appreciate your effort and will try to fix the article